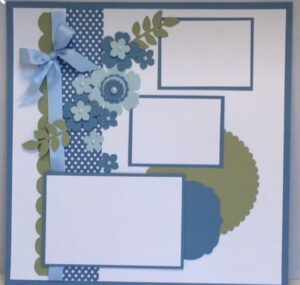
Starting a scrapbook can feel overwhelming—so many papers, embellishments, and layout ideas! If you’ve ever thought, I don’t even know where to start, you’re not alone. But don’t worry—I’ve got you covered! In this guide, I’ll walk you through the 5 simple steps to start your first scrapbook without stress.
Step 1: Choose a Theme 🎯
Before you even touch the paper, ask yourself:
➡️ What story do I want to tell?
➡️ What memories do I want to preserve?
Here are a few easy theme ideas to get you started:
✔️ Family Memories – A mix of everyday moments and special occasions
✔️ Travel Adventures – Document a favorite trip with maps, tickets, and photos
✔️ A Year in Review – Highlight milestones, holidays, and big events
✔️ Baby’s First Year – Capture the sweet moments of early childhood
✔️ A Special Event – A wedding, birthday, or anniversary album
👉 TIP: Choosing a theme helps narrow your focus so you’re not overwhelmed with too many design choices!
Step 2: Gather the Basics ✂️
You don’t need a craft store’s worth of supplies to start! Here are the 5 must-have scrapbook supplies:
🖼 Album or Notebook – Choose a size that feels manageable (6×8″ is a great beginner size!)
📸 Photos – Print out your favorites! Mix close-ups and wide shots for variety.
📄 Paper & Cardstock – Stick to coordinating colors that match your theme. (Need help choosing colors? Grab my FREE Color Theory Cheat Sheet https://heartandhandcreations.com!)
🖊 Adhesives – Use photo-safe glue or tape to keep your pictures from yellowing over time.
📝 Journaling Pens – A fine-tip black pen is great for writing small notes, dates, and captions.
👉 TIP: If you’re on a budget, start with a small paper pack and stickers—they’re already coordinated, making it easy to create a polished look!
Step 3: Start with a Simple Layout 🖼
Instead of staring at a blank page, start with this easy formula:
🔳 One focal photo – The star of your page!
📌 One or two supporting photos – Smaller or background images
🎨 A simple title – A phrase that describes the moment
🖊 A short journaling note – Who, what, when, and why
✨ A few embellishments – Stickers, washi tape, or die-cuts to add personality
👉 TIP: If you’re stuck, use a scrapbook sketch (pre-made layout templates). These take the guesswork out of design!

Step 4: Add Photos & Embellishments 🎨
Now for the fun part! Here’s how to arrange your page in layers:
1️⃣ Lay down your background paper (solid or patterned)
2️⃣ Position your photos first—DON’T glue yet! Move them around to find the best layout.
3️⃣ Add a title & journaling—Write a quick note about the moment.
4️⃣ Embellish, but don’t overdo it! A little goes a long way—think clusters of stickers or die-cuts.
5️⃣ Glue everything down once you’re happy with the layout.
👉 TIP: If your page feels cluttered, remove one element—less is often more!
Step 5: Don’t Overthink It—Just Start! 🚀
Scrapbooking is about preserving memories, not perfection. You don’t need to be a professional artist or spend a fortune on supplies. The key is to start simple and have fun with the process.
✨ Here’s your challenge: Choose ONE memory today and start your first page. You’ll be surprised how much fun it is once you begin!
📩 Need more inspiration? Sign up for my newsletter and get a FREE Color Theory Guide to help you pick the perfect paper combinations! https://heartandhandcreations.com
