The start of a new year is the perfect time to refresh your crafting space and set yourself up for a productive, creative year ahead! Whether you’re working on interactive scrapbook layouts, journaling, or other paper crafts, having an organized workspace can make all the difference. Here are my favorite tips and tricks for organizing your scrapbooking materials and keeping your creative zone tidy and inspiring.
1. Label Everything
Labels are an organizer’s best friend! From drawers and bins to folders and jars, adding labels makes it easy to find exactly what you need when you need it. Whether you use a label maker, pre-printed stickers, or handwrite them for a personal touch, this simple step can save you time and frustration.
Pro Tip: Color-code your labels based on categories, like papers, embellishments, adhesives, and tools. This adds a visual cue that helps you locate items even faster.
2. Create a Portable Supply Station
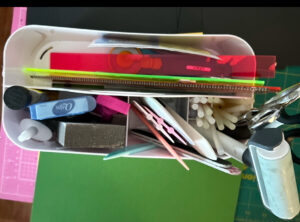
A shower caddy might not scream “craft supplies,” but trust me, it’s a game-changer! Use one to store your most-used items—scissors, tape, glue, rulers, guides, and other everyday essentials. The portability of a shower caddy means you can move your tools from one project to another without leaving a trail of chaos behind.
Why I Love It: It keeps everything within arm’s reach while working and makes cleanup a breeze when I’m switching projects.

3. Rely on Drawers and Bins
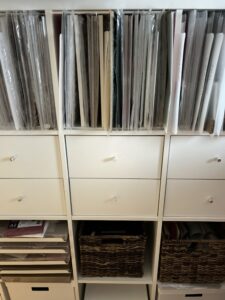
For less frequently used items, like specialty tools, seasonal embellishments, or larger supplies, drawers and bins are your go-to. They keep your craft room tidy and provide plenty of space for bulkier materials. Look for clear bins to make it easy to see what’s inside or use stackable drawers to maximize vertical storage.
Quick Tip: Group similar items together—all your stamps in one drawer, ribbons in another, and cardstock in a bin—to make your system even more efficient.
4. Keep Your Workspace Clear
The key to staying creative is having space to work! A cluttered desk can feel overwhelming, so make it a habit to clear off your workspace at the end of each crafting session. Use a desktop organizer or small tray to corral any loose items you need to put away later.
5. Rotate Seasonal Supplies
If you’re like me, you probably have materials for every season and occasion. To avoid clutter, keep out only the supplies you’ll need for current or upcoming projects and store the rest. For example, if you’ve just wrapped up your holiday scrapbooking, pack away the Christmas-themed papers and embellishments to make room for everyday or winter-themed supplies.
6. Make It Inspiring
Finally, don’t forget to make your crafting space a place you love to be! Add personal touches like framed art, twinkling lights, or a pinboard to display favorite scrapbook layouts. An inspiring workspace can do wonders for your creativity.
Take a Peek Into My Craft Room
I use a combination of all these tips to keep my own supplies organized. Here’s a quick rundown of my setup:
- Labels everywhere to make finding things a snap.
- A shower caddy for my everyday tools—I couldn’t live without it!
- Drawers and bins to keep papers, embellishments, and less-used items out of the way but easy to access.
Want to see it in action? Head over to my Instagram Stories or YouTube Channel for more details!

Start Fresh Today
A tidy craft space isn’t just about organization—it’s about creating an environment that supports your creativity and helps you focus on what you love: making beautiful scrapbooks and preserving cherished memories. Take a little time to declutter and reorganize your space, and you’ll thank yourself later.
Ready to get started? Share your organizing tips in the comments below, or tag me on Instagram to show off your craft space. I can’t wait to see what you create this year!
Happy organizing,
Jerrie
